
A stovetop cover board is perfect for those times when you just need a little bit more counter space and you aren’t using your stove burners. These Walnut Hollow Rustic Pallets are the perfect size for a standard glass top stove! In some parts of the country, they call these “Noodle Boards.” Whether you call it a stovetop cover, a tray, or a noodle board, this project is simple to make and makes a beautiful impact in the kitchen.

Here’s what you’ll need to make your own:
- Walnut Hollow Rustic Pallet, 7.75″ x 30″ (x3)
- Scrap Wood Slats
- Handles with installation hardware
- Wood Glue
- Wood Stain
- Sandpaper
- Felt

Step one:
Sand any rough edges off of your Rustic Pallets. You want the boards to be relatively smooth. You’ll find that one side of the Rustic Pallet is smoother than the other. The smooth side will be the top of your stove cover.

Step two:
Glue the three Rustic Pallets together. Run a bead of glue along the long edge, and piece them together. Press in place. Wipe off any glue beads on the top of the boards. Allow to dry completely.

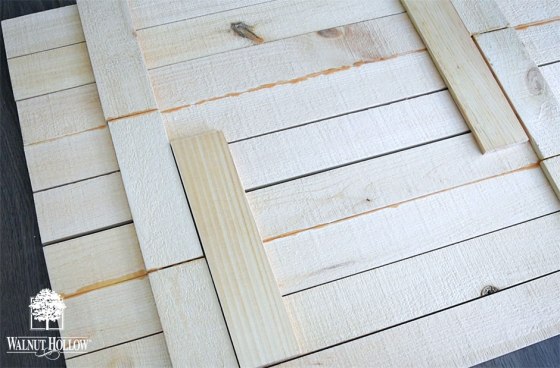
Step three:
Flip your board over and glue a few scrap slats underneath on the seams to give the board some added support. Allow the glue to dry completely.
Step four:
Stain or paint your stove cover. I chose to stain mine with a Dark Walnut stain because many of the wood accents in my home are this color. You can stain or paint yours any way you’d like. It would even look beautiful with a large stencil design in the middle if that’s your thing! I may come back and add one later, myself. Allow the stain to dry completely.

Step five:
Measure the holes in your handle hardware. I find it easiest to hold a ruler up to the bottom of the hardware and measure the distance between the screw holes, and then placing the same ruler on my surface and marking where the measurements were on the board. Drill holes through the board for your handle hardware to go through.

Attach the handles to the board.

Step six:
Flip your stove cover over and apply felt strips to the base of the boards. I did this because I did not want the wood to scratch my glass top stove. You can use wood glue to attach the felt, regular glue, or hot glue.

Place on your stove, and enjoy it! The three Rustic Pallets assembled together were exactly the size of a standard 30″ stovetop! No cutting required. Isn’t it amazing when things work out like that??

I just love my new stove cover, and now I feel like I have so much more counter space when I’m working in the kitchen but not using the stovetop.

I have a love/hate relationship with my glass top stove. Do you have one? Do you like it? This helps me to love it a lot more for sure! You can grab your Rustic Pallets here in the Walnut Hollow Store.
