
Happy National Craft Month! All month long we are sharing easy-to-make craft ideas from home decor, like today’s “bling” jewelry box by Sabrina Alery, to party planning, mixed media, and more. Be sure to subscribe to our blog and follow us on Facebook to see more projects all month long.

If you have girls in the house, you know they tend to collect a lot of jewelry and other small trinkets. And they love to have those treasures contained in a special place. When I saw the small divided card box from the Walnut Hollow box line, I knew it would be a perfect place to house those items.
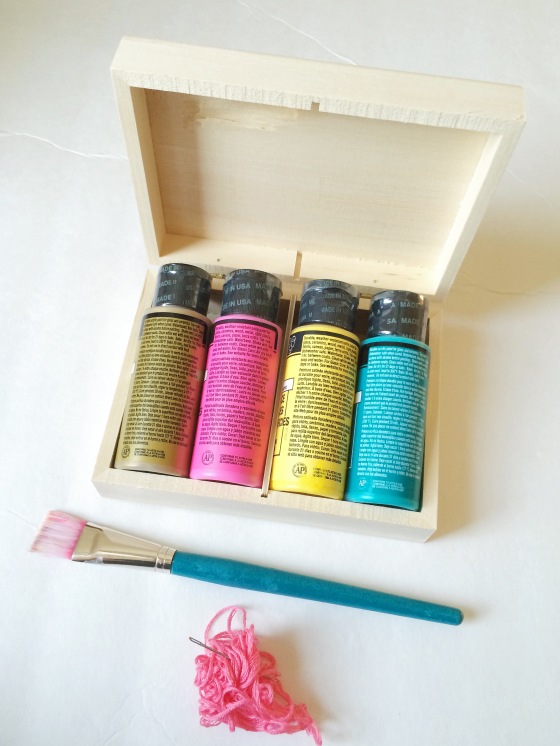
This decorated box contains a couple of my favorite things: bright colors and stitching. And it is so simple to recreate! You’ll need all the items pictured in the photo above – Card Box, paint, paintbrush, embroidery thread and a needle – as well as some type of drill to add the holes for stitching.

You will also need a template to stitch. Create your own or feel free to download the one below. It is sized to 3″ x 4″ and will fit perfectly on top of this sized box.

Trim the diamond shape, affix it to the top of the box and get ready to use your power tools! You can attach a router style drill bit or use a drill press. Drill into the circular area at each point on the template.
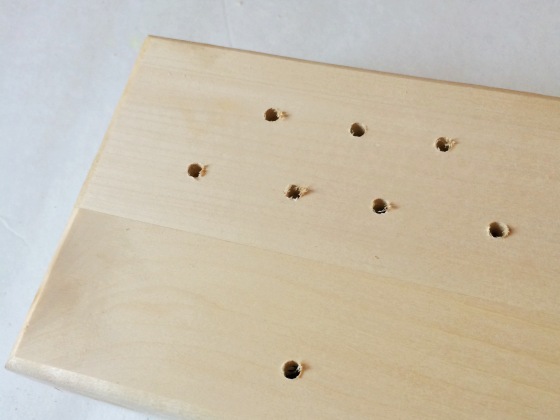
When you are finished, the holes will look similar to this. Gently sand away any rough areas from the drill.

Now it’s time to paint! Add only 1 color or as many as you like. You can paint in the diamond area to highlight the shape. Then allow to dry completely. Be sure to double check that any paint inside the holes is dry before adding the stitching.

Paint can be added inside the box as well for an extra surprise of color when it is opened. Yellow is my daughter’s favorite color.
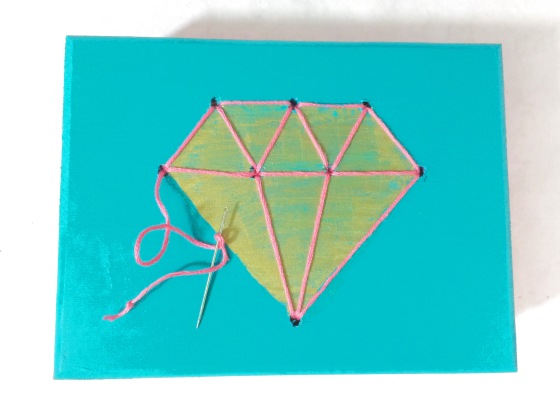
When all the paint is dry, it is time to add the stitching. Don’t worry about knotting off the thread – just hold onto the end as you pull the thread through each of the holes. Tie the beginning thread and the ending thread together on the inside of the box.

When you are finished, you’ll have an adorable bling-ed out jewelry box to gift to a young girl. Or keep for yourself 😉

What would you create with Walnut Hollow’s line of keepsake boxes? Check out the whole collection here.

Thanks so much for dropping in today! Please visit me at www.sabrinaalery.com or find me on Instagram (@salery).
-Sabrina

Great project, Sabrina. Love how you “stitched” on the Card Box!
Pingback: Rustic Bark Edge Shadow Box Earring Organizer | walnuthollowcrafts