
by Chris Wallace
It was fun turning a Basswood Canvas into a clock! Of course, anything you can drill a hole in can become a clock. You’ll need to use a 3/8” drill bit for the correct size hole in the item to hold any Walnut Hollow® clock movement.

Start by using a pencil and ruler to find the center of the Basswood Canvas – I used one that was 8” x 8”. Drill the hole in the center, then you’re ready to stain the wood.

To add color to the wood, it was really easy to use Tim Holtz® Distress Stains (Spiced Marmalade, Wild Honey, Frayed Burlap and Peeled Paint) because you can simply use the sponge applicators on the bottles to both add the color and blend the colors together.

After the Stains were completely dry – they dry quickly – I stamped the surface with Tim Holtz® Clear Stamps – Urban Grunge. Use Imagine Crafts Versa-Fine™ Ink to stamp each image.
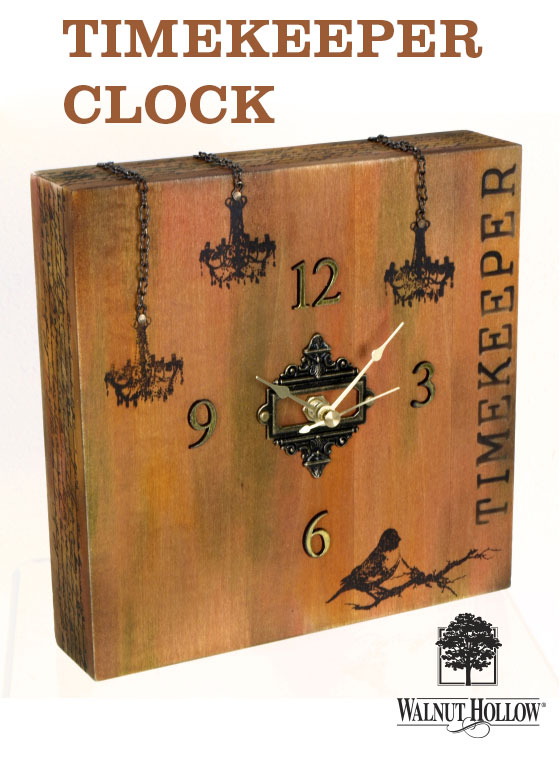
Add the chain and hammer small nails just above the chandlier stamped images to hold the chain in place – the other end of the chain is nailed to the edge of the Canvas. Add a Tim Holtz® Idea-ology® Ornate Plate in the center of the Canvas so the clock movement shaft will be in the center. Glue the Plate with Tombow MONO Multi Liquid Glue for a secure adhesion.


OK. Now comes the fun part! Use the Creative Versa-Tool® with the Alphabet Hot Stamps to add the word T-I-M-E-K-E-E-P-E-R.
After reading all manufacturer’s instructions found inside the Creative Versa-Tool, use pliers to attach “R” Hot Stamp alphabet letter on the Tool. Secure the Tool Stand to your work surface with tape. Place the tool on the stand and plug into an electric outlet, turn the Versa-Temp control dial between the Orange and Red Zones and heat for 4-5 minutes.


I started at the top right corner of the Canvas and spelled the word backwards to ensure that the spacing was correct. Begin with hot stamping the letter “R”. Remove the letter with pliers and drop the letter into a glass or ceramic dish. Attach the letter E” on tool and proceed with each letter until you are finished. When the word is complete, turn the Versa-Temp control to “O” (OFF) and let cool on stand.


Now you are ready to add the clock movement, hands and numbers. For this clock, I used a clock movement with a 3/8″ shaft to fit the thickness of the wood surface.
 The back of the package has the instructions for attaching the clock movement to the Canvas. Just follow along. Once you have the hands on as instructed, place the adhesive numbers that are included with the clock movement at the 12 – 3 – 6 – and 9 o’clock positions. I start with 12, move straight down to the 6, then go to the 3 and 9.
Add the AA battery, set the time and your TIMEKEEPER is ready to hang on the wall or sit on a tabletop for display.

Very NICE!!!! I like it!!!!
Pingback: 15 Easy Wood Craft Projects | walnuthollowcrafts