
The holiday season, with all it’s parties and entertaining, is coming at us fast! But not all the meals this fall and winter will be formal sit down dinners. Today I’m sharing how to make sandwich serving boards to make your casual meals a little more interesting, too.
Supply List for Sandwich Serving Boards
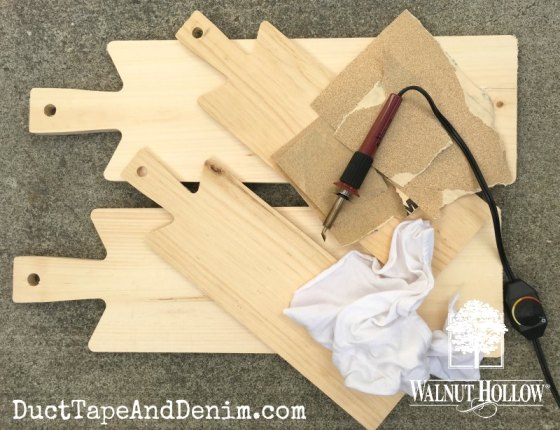
- 2 large rustic bread boards
- 2 small rustic bread boards
- Creative Versa-Tool (The shading point comes in this kit.)
- sandpaper
- soft rag
- pencil
- eraser
- food grade mineral oil
First, prepare the boards for wood burning by sanding. Then wipe off all the dust with a soft rag.
Insert the shading point into the Versa-Tool, turn it on, and allow it to heat up. Lightly sketch a few flowing lines across the ends of the small boards using a pencil. When the Versa-Tool heats up use the edge of the shading point to burn a thin line. Erase any pencil lines that still show.
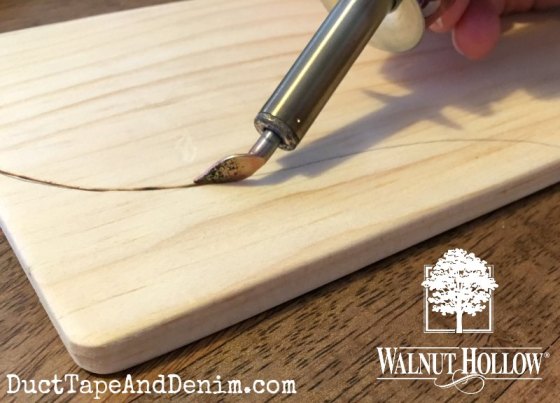
Then go back and add the leaves with the large flat area of the shading point.

Use a bowl to trace a circle on one end of the large rustic bread boards. Trace over with the edge of the shading point, then add the leaves.

To finish, rub food grade mineral oil into the wood, wipe off, and buff.
Note: These are serving boards. The wood is soft so don’t cut on them.

The circles are perfect for bowls of soup or dip.
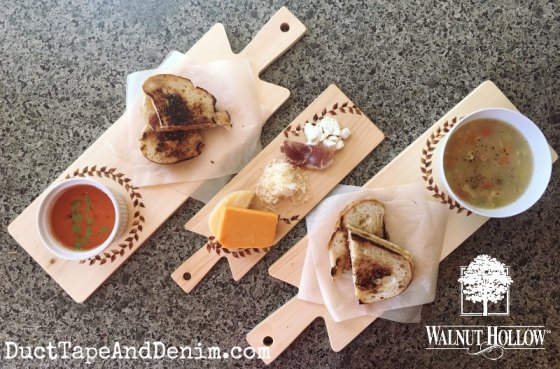
I hope you and your guests will enjoy a few meals on these sandwich serving boards this fall.

And before you go, enter our giveaway this month! Click the link below and follow the prompts to enter: a Rafflecopter giveaway
https://widget-prime.rafflecopter.com/launch.js
Thanks for reading! Don’t forget to visit the Walnut Hollow shop to find unfinished wood products for your next project.
 BIO
BIO
I’m Ann Tatum from Duct Tape and Denim. I’m a jewelry designer but I can’t contain my creativity to just jewelry! From childhood I’ve loved just about every craft I’ve ever tried. And my studio currently looks like I’m enjoying every craft! I especially love upcycling vintage finds. I raised two daughters who are now married, have one grandson, and live with my musical husband and the boss of our house, the cat. Follow our adventures on DuctTapeAndDenim.com.

Great idea. Like you I think over the years I’ve done everything. Always thinking.. Just did some mug racks. Mostly all Woodburned, clocks, trivets, etc. thought I’d done it all. Just wanted to say this is a great idea.. I love it.. Now if there was 48 hrs to a day I’d be all set. My problem is pricing. Do custom signs and never know whAt to charge… Good job..great idea.. Phyllis. Pjsartandsigns
This burned design is so elegant! I love how you elevated somewhat ordinary items into something really special.
Pingback: 25 EASY Wood Burning Projects | walnuthollowcrafts
Pingback: Top 20 Easy Wood Burning Crafts | The Crafty Blog Stalker
Pingback: 20 DIY Wood Burning Art Project Ideas & Tutorials | DIY