
Yes it’s only mid-October but it’s time to start thinking about handmade gifts. I have a great gift idea for the tea lover on your list: a wood burned tea box. I’m a tea lover myself, and I’d love to receive something like this!
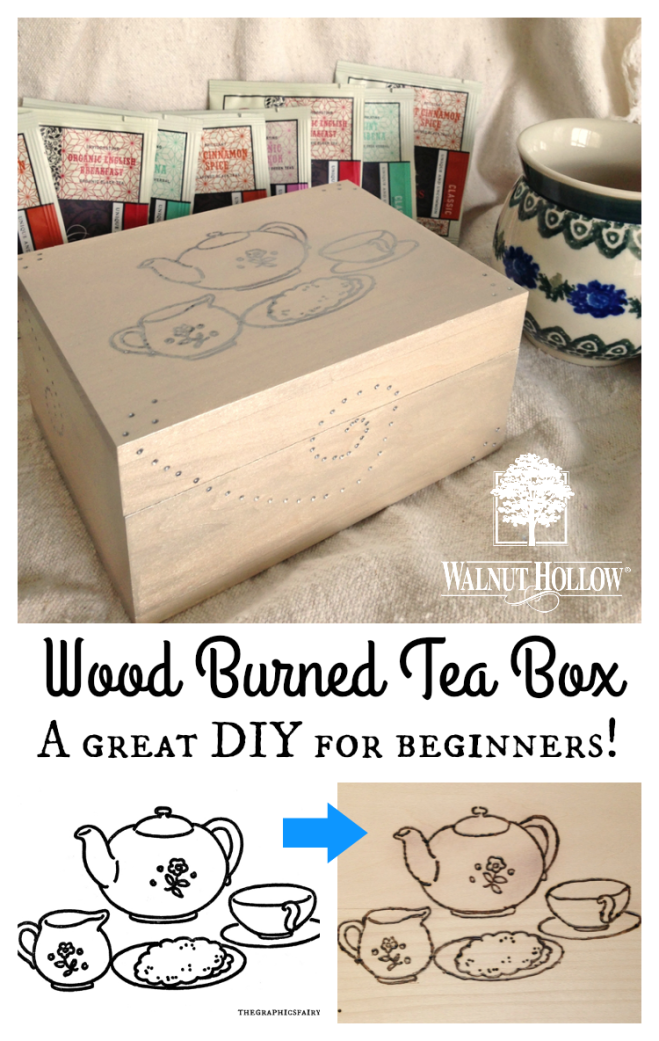
Wood burning is easier to learn than you might think. And I’m here today to show you how I made my wood burned tea box. This tea box is only the second wood burning project I’ve done so far, so if I can do it…you can do it!
Wood Burned Tea Box
Supplies:
- Basswood Classic Box – Walnut Hollow
- Creative Versa-Tool® – Walnut Hollow
- Mini Flow Point – Walnut Hollow
- DecoArt Dazzling Metallics in Oyster Pearl – DecoArt
- Laser copy of black and white line art – tea set
- Paint Brush
- Wax Paper
- Scissors
Basswood is an excellent surface for woodburning as it is a soft wood. I chose to use Walnut Hollow’s Classic Box for my tea box. I love the clean lines of the box:

I found the perfect vintage line art image on TheGraphicsFairy.com:

Time to Transfer an Image!
There are many ways you can transfer images for wood burning. I like to use the Transfer Point on the Creative Versa-Tool. Here’s how you can transfer an image using this tool.
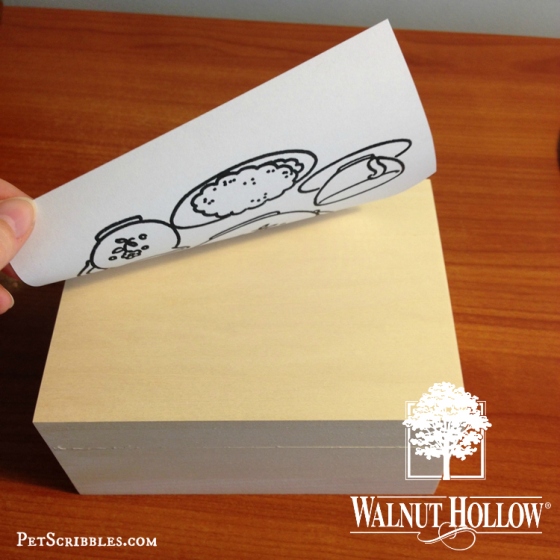
Step One: Make a laser copy of your chosen image in reverse.

Step Two: Cut around the copied image and attach it to your surface face down, so that the image is against the wood. I use a few pieces of washi tape or masking tape as it holds the paper well yet is easy to remove.

Step Three: Turn up one or two corners of the paper to make it easy to lift up and check your work while transferring the image. I learned this trick on Walnut Hollow’s YouTube channel, and it does make a difference. It’s the little things!

By the way, Walnut Hollow has a wealth of knowledge about wood burning on YouTube. The videos are short and to the point and clearly demonstrated and explained. Trust me: I watched almost all of them so far as I’m learning how to work with the Creative Versa-Tool!
When wood burning, always tape the stand to your work surface, just for added security and stability. You don’t want a hot tool sliding around in its stand!
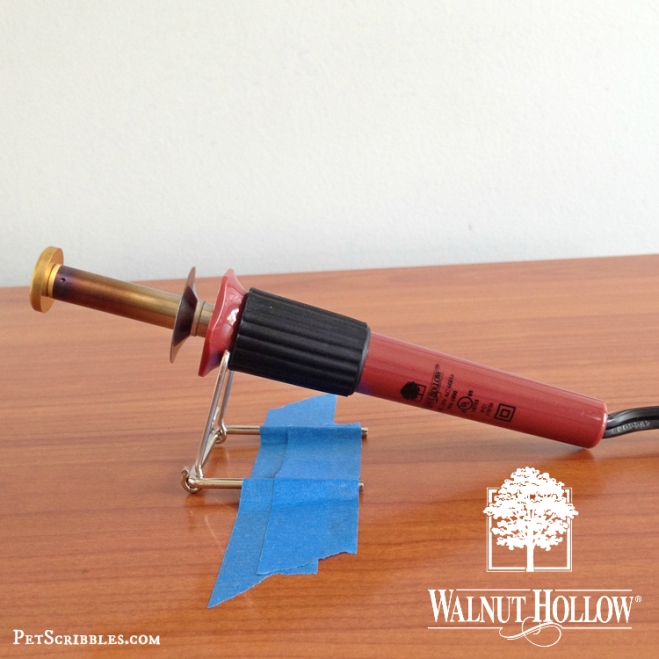
Step Four: Transfer your image to the wood surface.
With your transfer point on your Creative Versa-Tool, you’ll have it positioned like this while transferring your image:

Here is short video about using the Transfer Point that explains it much better than I can:
Chris Wallace described it for you (and for me) perfectly! Watching Chris is like having a one-on-one class with an expert for free!
Here’s my successfully transferred image:

Here’s my paper and as Chris pointed out in the video, you will get some burn marks on the paper, especially if you sit too long in one area, as I did.

Those darker areas on the paper can also end up meaning darker areas on your wood surface. I had a few of these areas on my basswood box when my transfer was complete. I’ll show you that in a moment.
Time to Wood Burn!
Step Five: Wood burn your image using the mini flow point.
The Mini Flow Point is one of the many accessories you can purchase for your Walnut Hollow wood burning tools. I love using this point as it has a small, rounded tip that glides smoothly over the wood. Plus it was almost the same size as the lines of the tea set!
Here’s how my wood burned image turned out:

I’m sharing a couple of close-up shots to show you my own mistakes to help you be on the lookout so you can avoid the same thing. (And if you do make the same mistakes that I did? Shrug your shoulders and smile because wood burning is a fun hobby! I find it to be very relaxing!)

In the above image, the arrows point to some dots that shouldn’t be there. If I’m pulling the Versa-Tool toward me as I wood burn, the lines are much smoother. If I try to push the tool away as I wood burn, the tool gets stuck in the soft wood and that’s how I got those dots.
It’s also much easier to wood burn with the wood grain versus against the grain. I know that practice makes perfect or at least better!

Remember those darker blemishes I mentioned earlier? The arrows in the above image show you a few on the teapot. (And if you scroll back up to the picture of the entire woodburned artwork, you’ll notice them there too.)
I wasn’t worried about these blemishes, as I planned on painting this piece. And that’s a great tip for us beginners – use paint to mask any details you wished weren’t there.

After I finished the tea set, I still wanted to do more wood burning, so I made a series of dots and swirls on all four sides of the box.

Paint or Stain Your Tea Box
Step Six: Paint the inside and outside of the tea box with two coats of DecoArt’s Dazzling Metallics in Oyster Pearl. Just paint it on with a small paintbrush. You’ll quickly see that it’s rather transparent, giving the box a pretty, metallic sheen.

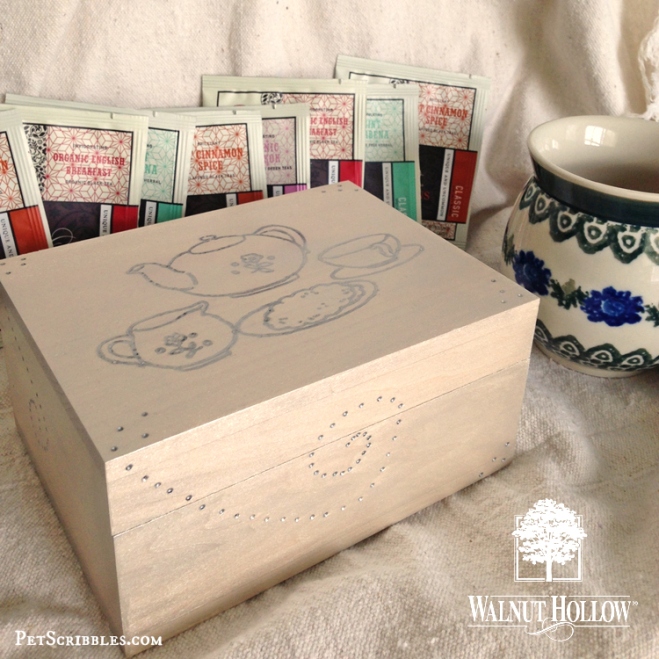
I love how the metallic paint seeped into the wood burned images and dots:

Turning this into a handmade gift is the easiest part. Just fill with an assortment of tea bags!


I hope I’ve convinced you that not only is wood burning totally doable, but it’s also very relaxing and a very satisfying craft too!
Head over to Walnut Hollow’s website here to see a selection of unfinished wood boxes just waiting for your own creativity to turn them into a special handmade gift!
Happy wood burning!

I’m Laura, the creative mind behind Pet Scribbles, my blog where I share craft tutorials, home and garden projects, and occasional cat stories. I can never have enough pretty craft paints to work with, and I love to make things look time-worn with distressing and aging — especially wood projects both large and small. Stop by!

Pingback: Wood Burning for Beginners
What a great gift idea! I love the wood burning and how the metallic looks in those areas. Pretty!
This looks amazing. I want to give wood burning a try!
This is so cool Laura! It looks professional. I am so jealous of your mad wood burning skillz!