Make this rustic wedding anniversary sign and it will fit right in with today’s rustic style weddings. Whether you make this for your own wedding, or give this to the happy couple, this rustic wedding sign will be a timeless and beautiful reminder of a very special day.

Rustic Wedding Style
One of the big design trends in weddings right now is anything rustic. I’ve always loved this style, and when I got married 10+ years ago, we held an outdoor wedding and incorporated several rustic elements to our ceremony and reception.
I’ve seen many rustic wedding anniversary signs on Pinterest, many with the wedding date on them. People have used small wood slices with their wedding date or name wood burned onto them as wedding favors or unique save the date magnets. I’ve seen large wood signs used in wedding announcement pictures, with the happy couple holding up a wood sign.
Today I’m showing you how you can create a wedding gift in this wonderful rustic style. This rustic wedding anniversary sign is just that: it can be used as a wedding gift, as a part of your wedding decor, or in my case as an anniversary gift for my husband and I to enjoy.
Supplies:
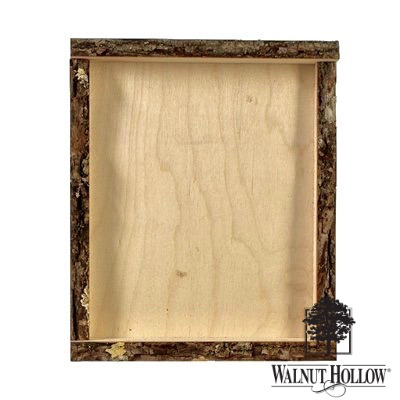
- Bark Edge Shadow Box, 8″ x 10″ — Walnut Hollow
- Wood Mason Jar Shape — Walnut Hollow
- Creative Versa-Tool® — Walnut Hollow
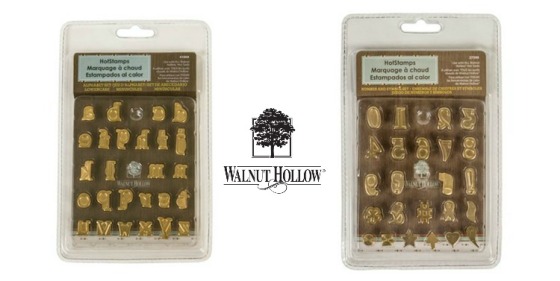
- HotStamps Alphabet Set, Lowercase — Walnut Hollow
- HotStamps Numbers & Symbol Set — Walnut Hollow
- Floral and vine stencils
- Pencil
- Washi tape
- Pickling wash or stain
- Small and medium paintbrushes
- White rag or lint-free cloth
- Wood cubes or small piece of scrap wood (will be used to mount mason jar shape)
- Strong adhesive
- Vintage seam binding or ribbon
Check out this mason jar wood shape!

It’s a nice size and fits perfectly inside the shadow box.
Walnut Hollow products are made in the USA with a focus on the environment. (You can read about their commitment to the environment here.)
Walnut Hollow products are easy to customize with paint, wood burning, stain, mixed media techniques and whatever else you can think of, to create beautiful home decor, crafts, and art.
Here’s the HotStamps that I’m using: lowercase letters (below left) and the numbers (below right).
Practice Makes (Almost) Perfect
Before using the HotStamps, it is really helpful to practice, practice, practice on scrap pieces of wood. I always try to use the same type of wood as what my project will be. For example, you can wood burn on several different types of Walnut Hollow surfaces such as pine, basswood, birch and more.
Here’s one of my lovely practice surfaces where I practiced my letters and numbers:

There are plenty of helpful videos on the Walnut Hollow YouTube Channel.
The main point I’ll make here is to make sure you gently rock the hot stamps to help you get the complete letter or number wood burned onto your surface.
If you look at my practice surface above, you’ll see that some of my “2” numbers weren’t completely wood burned (A). I wasn’t gently rocking the number hot stamp to help get a good imprint. If you look at the letter “a” you will see the opposite effect (B). I was pressing a bit too hard.
So it takes practice, but don’t stress about it! Part of the appeal of wood burning is that you have created it. You’ll see in my project today that some of my letters and numbers didn’t turn out 100% perfect. That’s ok. I’ll just continue practicing!
(And by the way, wood burning is so relaxing!)
Rustic Wedding Anniversary Sign
Step One: Figure out the overall placement of words and designs on your mason jar shape.
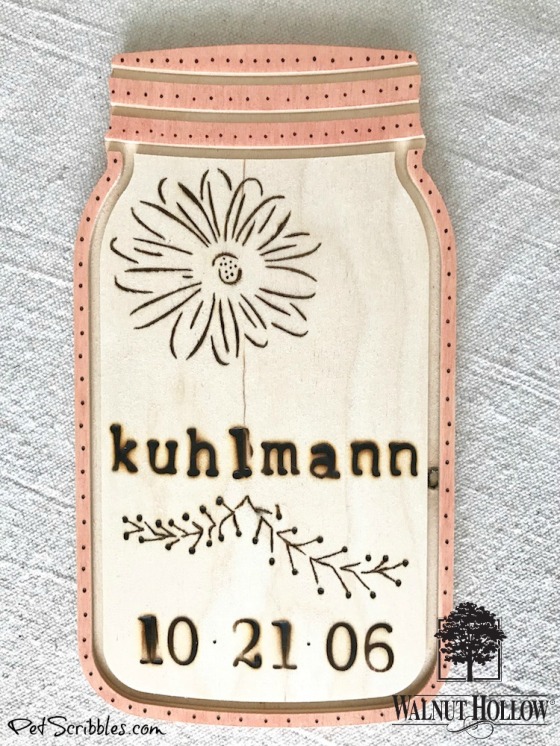
I wanted to use our last name (Kuhlmann) along with our wedding date. I also wanted to wood burn a flower onto the mason jar.

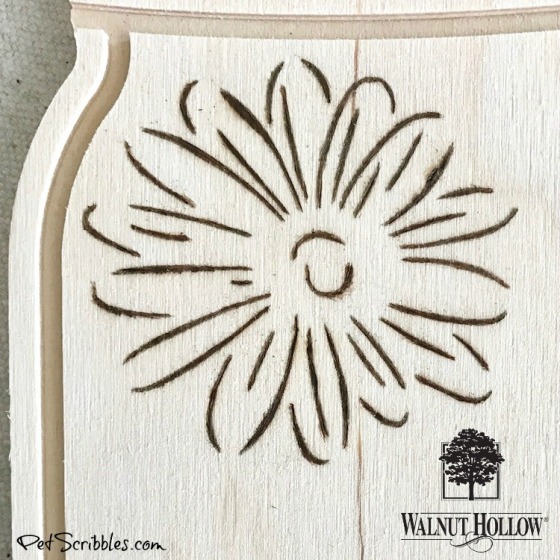
Step Two: Place your floral stencil where you want the wood burned design to be.
Hold the stencil in place with washi tape. (below left)

Draw in the floral design lightly with a pencil. Remove the stencil. (above right)
Step Three: Using the Creative Versa-Tool and the Calligraphy Point, wood burn the floral design into the wood.
First, I went over the flower design very lightly. Then I went back over it again to really make the flower pop!
Step Four: Using the Creative Versa-Tool and the HotStamps Alphabet Set, wood burn your last name onto the mason jar shape.
I began by stamping the first and last letters on each end, to help me keep the placement between letters more even.

Next, I began filling in the next letters from both ends of the name, again to keep the placement as even as possible.

Step Five: Place your vine stencil below the wood burned last name and hold in place with washi tape. Just as you did with the floral stencil, use a pencil to lightly draw in the vine design onto the wood. Remove the stencil.
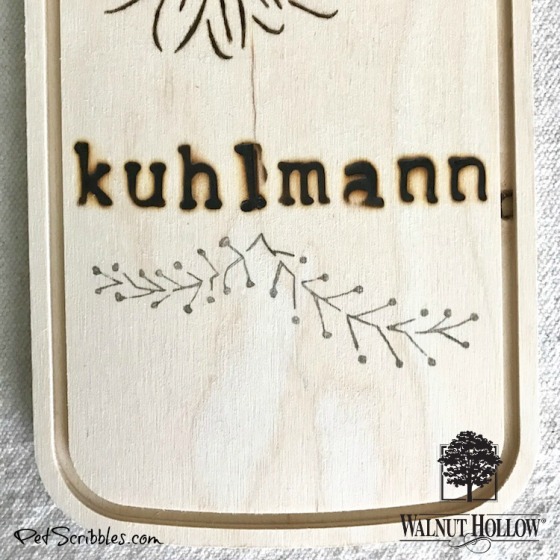
Step Six: Wood burn the vine design. I wood burned the berries (dots) first, using the Creative Versa-Tool with the Flow Point attached. Then I switched to the Calligraphy Point to wood burn the rest of the design.
Step Seven: Using the Creative Versa-Tool and the HotStamps Numbers, wood burn your wedding date onto the mason jar shape, below the vine motif.
Step Eight: Using the Creative Versa-Tool with the Mini Flow Point, wood burn tiny dots along the top “jar rim” of the mason jar shape, as well as along the rim of the entire jar.

I love the tiny dots you can make with the Mini Flow Point! I even added some dots to the center of the flower.
Here’s how the mason jar wood shape looks so far:

Step Nine: Using the pickling wash or stain or your choice, lightly stain the mason jar, except for the recessed grooves.
With most pickling washes or stains, you apply it in small sections… (below left)

…then immediately wipe it off with a lint-free cloth. I use a white rag. (above right)
What is left is a very light wash of color, perfect for this rustic look.
Continue working in small sections and repeat this process for the main part of the mason jar shape. Set aside to dry.
Helpful tip: I’ve noticed when I use stain — or in this case, pickling wash — the color doesn’t cover up the dark wood burned areas like paint does, nor does it dilute the dark brown color of the burned wood. This comes in handy when doing rustic style projects, such as this rustic wedding anniversary sign, as you want to see that lovely wood burned effect.
Step Ten: Paint the inside and outside of the Bark Edge Shadow Box with pickling wash or stain.
I used a driftwood color, to give the wood a nice weathered look. Set aside to dry.
The process was the same as I did in Step Nine.
Step Eleven: Using strong adhesive, attach small wood cubes to the inside of the shadow box. (You will attach the wood mason jar shape to these in the next step.)
Lay the shadow box flat to make this easy. Once I glued each of the pieces of wood in place, I put a small — but heavy — book on top to keep everything in place while it dried. (Follow package instructions for the drying/curing time of your chosen adhesive.)
Helpful tip: You can also use a small piece of scrap wood for this step. Just make sure whatever you use is small so that it isn’t visible underneath the jar. Another idea is to simply attach the mason jar shape onto the back of the shadow box itself.
Step Twelve: Wrap a piece of vintage seam binding or ribbon around the rim of the mason jar shape and tie a bow.

Step Thirteen: Attach the mason jar shape to the wood pieces using strong adhesive.
I purposely wanted the mason jar to appear like it was floating in the middle of the shadow box.
Again, make this easy on yourself by keeping the shadow box laying flat while you glue, position, hold and let dry!
I placed a heavy book on top and left it that way overnight while the adhesive dried and cured.
The next morning, my rustic wedding anniversary sign was ready to display!

Whoo hoo! Walnut Hollow is having a fantastic sale right now on their wood burning supplies! Just click the image below — or click here — to head straight to the Wood Burning section of their website!

You can also scroll back up (in this post) to see the exact supplies I used for this project.
If you need a good starting point — the Creative Versa-Tool is a really great tool to own, and it comes with several interchangeable points. (There is a helpful set of instructions on the Creative Versa-Tool page where you can click and see everything that is included.)
Happy crafting!

I’m Laura, the creative mind behind Pet Scribbles, my blog where I share craft tutorials, home and garden projects, and occasional cat stories. I can never have enough pretty craft paints to work with, and I love to make things look time-worn with distressing and aging — especially wood projects both large and small. Stop by!


