DIY Leather Woven Mini Wood Crate

Make a beautiful multi-texture Woven Leather Wood Mini Crate with Walnut Hollow #leather #crate

I love to combine beautiful wood textures with other media! Wood and leather go particularly well together I think.  Varying thin leather straps woven through the slats of a Walnut Hollow Mini Crate creates a fun texture combination.  You can … Continue reading

Rustic Feather and Pallet Home Decor

Rustic Feather and Pallet Hanging

Are you digging the trends that have been happening in home decor lately? I sure am, and one of my favorites are feathers. They’re one of those design elements that give creators a number of options and when you pair … Continue reading

Chippy Paint Finish on Shutters

How to do a simple chippy paint finish on shutters using petroleum jelly.

One of the prettiest ways to get organized is to use wood shutters. Today I’m showing you how to do a simple chippy paint finish on shutters to get that wonderful time-worn look using petroleum jelly. Get Organized with Wood … Continue reading

Day of the Dead Painted Wood Sugar Skulls Trio

Day of the Dead is rapidly approaching. To prepare, I created a painted wood sugar skull trio, for my front porch. I love bright and colorful decorations for Day of the Dead. This is a great piece of home decor, … Continue reading

The Cutest Painted Pallet Wood Pumpkin Patch Ever!

Painted Pallet Pumpkin Patch

Do you love the wood pallet pumpkins you’ve been seeing all over Pinterest? Me too! Walnut Hollow has new pallet wood pumpkin shapes this year! No more cutting your own pallets up and getting frustrated when yours (mine) don’t turn … Continue reading

Joy to the World

By Chris Wallace for Walnut Hollow

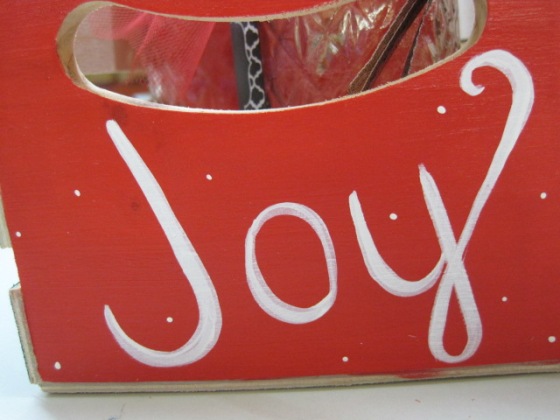
Joy to the World Centerpiece and FavorsThis centerpiece is a holder for favors you can give your guests or visitors when they are in your home for the Christmas Holidays – you could also create another, more generic, one that could be used throughout the year.

23876I began the project with 3 Mini Crates and 6 small Ball® jars. Using a large flat brush, paint the slat sides of each Crate with DecoArt® Americana® acrylic Holly Green and the ends with Tuscan Red. I used 2 coats of each color, sanding lightly between coats with fine sandpaper. Let dry thoroughly.

IMG_2337IMG_2342Use a piece of chalk to write the words “Joy to the World” on the ends of the Crates. Use a medium round brush with DecoArt® Americana® Warm White to paint the worlds.

IMG_2341Use a thin liner brush to paint thin lines to make snowflakes on the side slats. Add dots to the snowflakes and all over the Crate using the wood end of the brush handle.

When the Crates are thoroughly dry, use a large flat brush to paint 2 coats of Americana® Matte Varnish for a protective finish.  Let dry.

IMG_2339Attach chalkboard stickers to each jar. Use a Bistro Chalk Marker to write your guest’s names on the labels and fill the jars with goodies. Tie a knot with red tulle at the top of each jar.

IMG_2338Using 3 types of ¼” ribbon (I used red, green and gold), tie the Crates together in 4 places. Place 2 jars in each crate.

Send the jars home with your guests or visitors as favors! Enjoy your Holidays with family and friends.

When In Doubt, Twirl

By Judi Kauffman for Walnut Hollow

We are excited to be blog hopping with Quietfire Design all this week. We have so many creative projects to share with you using Quietfire Design high quality rubber stamps with Walnut Hollow Wood Surfaces and Tools.
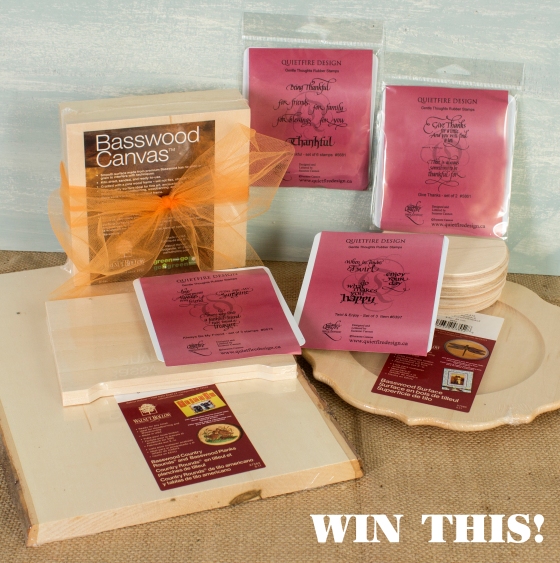
Walnut Hollow + Quietfire Design Prize

We have a great prize to give away. Let us know what you think about our projects by leaving comments. We will choose a prize winner Monday, October 6. Leaving comments on all of the projects will increase your chance of winning! See where to go next at the end of my post!
 

???????????????????????????????

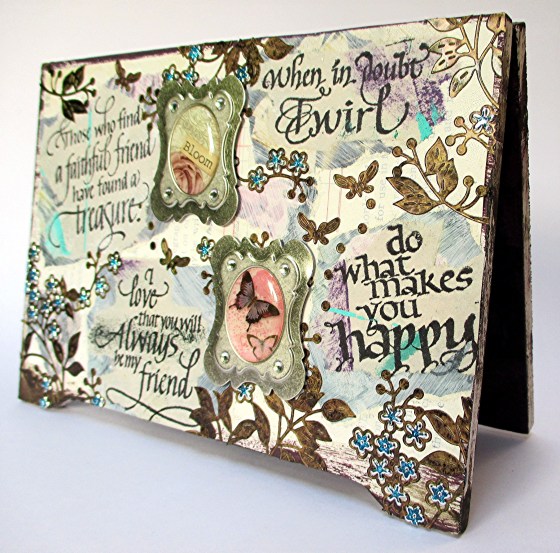
Thanks for inviting me to be part of the Walnut Hollow/Quietfire Design Blog Hop! I made a Mixed Media Hinged Sign, a gift for a friend who loves flowers and butterflies and anything that’s shabby-chic. It’s very much a girly-girl project, that’s for sure.

The collage layers include pages from cast-off books. I stamped on paint-smudged newsprint to give the phrases the same vintage look as the background. And I altered the Black Flower Branch Peel-offs with Gold Metallic and Currant inks to create the feel of weathered metal.

I added Glitter Flowers for a bit of extra sparkle. Stop at Step 8 if you like a more muted effect.

INSTRUCTIONS

1. Base coat exterior of Hinged Sign with Snow (Titanium) White. Mix Royal Purple and Traditional Raw Umber. Use this mix to distress the edges of the exterior of the Hinged Sign and to paint the interior.

2. Using white paint and a dry brush, paint over several pages from cast-off books, including some that have pictures of flowers. Allow text and images to show through.

3. Cut one piece of painted paper to fit the front of the sign. Glue it in place. Tear other pieces so they are about a half-inch larger than the stamps; glue the torn pieces in place.

Twirl-2ETwirl-1ETwirl-1C4. Use Jet Black ink to stamp phrases on paint-smudged newsprint. Tear around the stamped phrases, and glue them in place on top of the larger torn pieces from Step 3.

Twirl-1D5. Use the Ink Applicator Tool to apply Gold Metallic Mixatives to the sheet of Black Flower Branch Peel-offs, creating a mottled effect. Add Currant Alcohol Ink without cleaning the Applicator Tool. Peel-offs will take on the look of weathered metal.

6. Arrange Flower Branch Peel-offs, including some of the butterflies and dots. Refer to the photos for placement. Trim the Peel-offs at the sides of the Sign.

7. Use Power Tags to secure two “Trinkets” (Bloom and Butterflies).

???????????????????????????????

8. If you like the Hinged Sign as it is, stop now.

???????????????????????????????

9. For more sparkle add a Glitter Flower to each of the flowers on the Flower Branch Peel-offs! TIP: The sheet of Glitter Flowers has many styles and sizes. Use the two SMALLEST 5-petal flowers. They are the perfect fit for the flowers in the Flower Branch Peel-offs.

SUPPLIES

Walnut Hollow – Rustic Pallet Collection Hinged Sign 40255

Quietfire Design – Twirl & Enjoy Stamp Set 6393, Always Be My Friend Stamp Set 5615

Tombow – Power Adhesive Tabs, MONO Multi Liquid Glue

Elizabeth Craft Designs – 123 Flower Branch Peel-offs in Black, 7048 Glitter Flowers in Turquoise/Silver

DecoArt – Americana Acrylics in Royal Purple, Traditional Raw Umber, and Snow (Titanium) White

BoBunny – Isabella Collection Trinkets


Thanks for stopping by to see my Thankful Chargers and Trivets! Now go see what Yvonne and Robyn have created! http://quietfirecreations.blogspot.ca/

Halloween Tree

By Chris Wallace for Walnut Hollow

Walnut Hollow Crafts | Halloween Tree

Remember? I said I was going to doing something “un-traditional” with the Rustic Tree. This is just the first one and it was so easy to make!

IMG_2200

IMG_2201

You could use regular Black acrylic paint for the “branches”, but I used DecoArt® Americana® Chalkboard Paint™ so I could change the words from year to year if I wanted. Use a large flat brush to paint the Chalkboard Paint on the branches. Follow the instructions for painting 2 coats and letting it dry thoroughly.

IMG_2204

Using a large flat brush, paint the “trunk” of the Tree with DecoArt® Americana® Chalky Finish, Heritage. By now, I guess you know that this new paint from DecoArt is a huge favorite. It’s nice and thick – you only need one coat.

IMG_2206

The Marvy® Chalk Markers are great to use on the Chalkboard Paint. Usually I rub a regular piece of chalk over the dry paint to condition it for the Chalk Marker or for regular chalk. This time, I just left the paint as is and wrote with the Chalk Marker right on top.

IMG_2203IMG_2207

I wanted to add a few things to the tree – like ornaments. I decided to paint clothespins and nail them to the branches here and there so I could pin a few things.

IMG_2208IMG_2209

This is your early idea for the upcoming Halloween season. Better get started now – Happy Halloween!


Rustic Tree

By Chris Wallace for Walnut Hollow

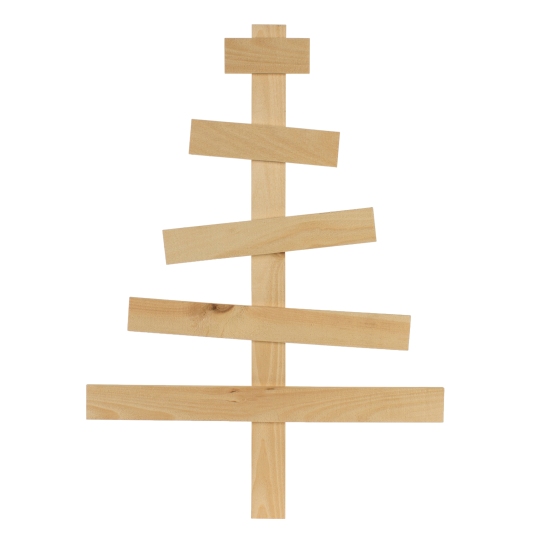
RawI was so excited when this Rustic Tree became part of our Rustic Pallet Program! I thought of many ways to use it, but decided that I’d better create one for the upcoming Holiday Season before moving onto other ideas that are a little less traditional. On Facebook the other day, I was reminded that there are only 16 weeks until Christmas. Yikes! Time to get things started……….

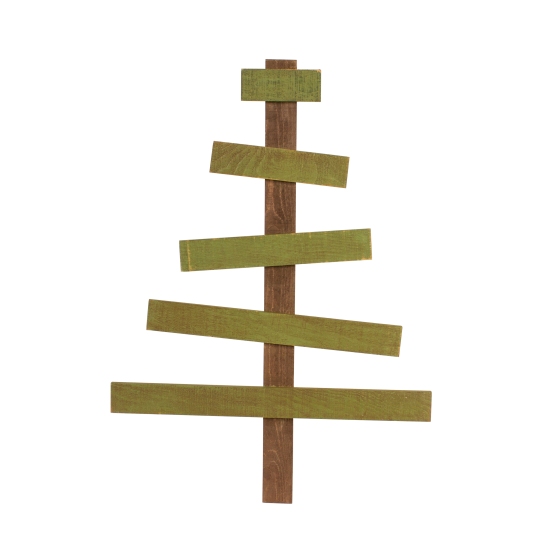
IMG_2110Paint the trunk of the Tree with a large flat brush and a wash of color – I used DecoArt® Americana® Dark Chocolate with water. Paint the green branches with DecoArt® Americana® Hauser Green.

IMG_2115After the branches are dry, use a sanding block or an electric hand sander to sand back the paint on the edges and other places on each slat to be antiqued later.

IMG_2116Antique each slat with a mixture of Americana® Staining/Antiquing Medium™ and Dark Chocolate. Brush the mixture onto each branch and wipe off the excess with a soft cloth.

40701Your plain Tree should look like this.

IMG_2138Take the clothespins apart. Use a medium flat brush to paint all sides of each clothespin with Americana® Décor™ Chalky Finish Rouge. Once dry, put the clothespins back together – I find using a pair a needle nose pliers helpful for this step.

40701 With CardsStart clipping the Christmas Cards that you and your family receive as they arrive so you can enjoy them throughout the Season!

An Apple for the Teacher

By Chris Wallace for Walnut Hollow

Teacher Desk SignNeed a gift for your child’s teacher or a sign for your desk if you are a teacher? Here’s a really easy project that’s sure to please any teacher.

40189 side 2Begin the project by spraying the Walnut Hollow Tabletop Sign with 2 coats Design Master® Turquoise. Dry thoroughly.

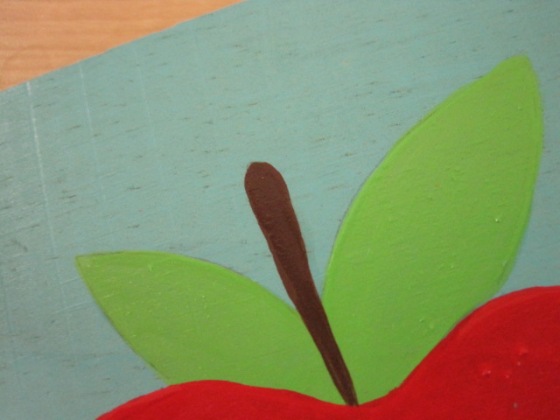
IMG_2037For the apple design, trace one you find on the internet, trace a stencil or draw one on the Sign with a pencil. I used an apple design that was in a stencil packet with all kinds of fruits and vegetables. I used DecoArt® Americana® acrylics to paint the apple, leaves and stem. Use a medium flat brush to apply 2-3 coats of True Red for the apple.

IMG_2040

Use the same brush to paint the leaves with Sour Apple. You’ll need a medium round brush for the Dark Chocolate stem. I used the wooden handle of the brush to place descending dots of Warm White on the left side of the apple for a “shine” area. Simply open the lid and dip the end of the handle to pick up the paint and lay the dots down (without re-loading the handle). The dots will descend in size as the paint comes off the handle. Let dry.

After the dots are dry, a nice addition is 2 coats of satin varnish. Only varnish the apple, leaves and stem – nothing else on the sign.

IMG_2041I used plastic adhesive letters to spell out the name and room for the teacher.

IMG_2042

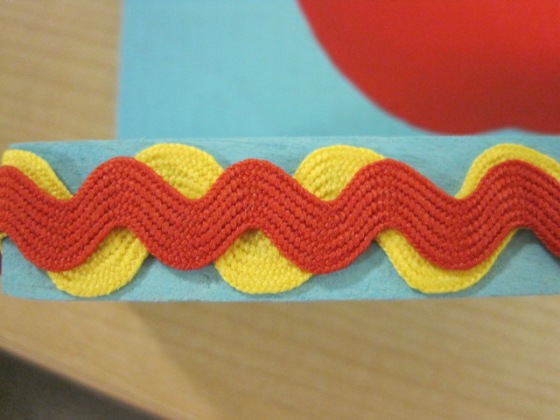
The final touch is to glue Wrights® Rick Rack around the bottom of the Sign. I used white glue to first adhere Yellow Jumbo Rick Rack, then Red Medium Rick Rack over the Yellow. Let everything dry.

This is Mrs. Walker’s first year of teaching. She’ll love placing it on her desk! Remember a special teacher this year as the teachers and students head Back to School.